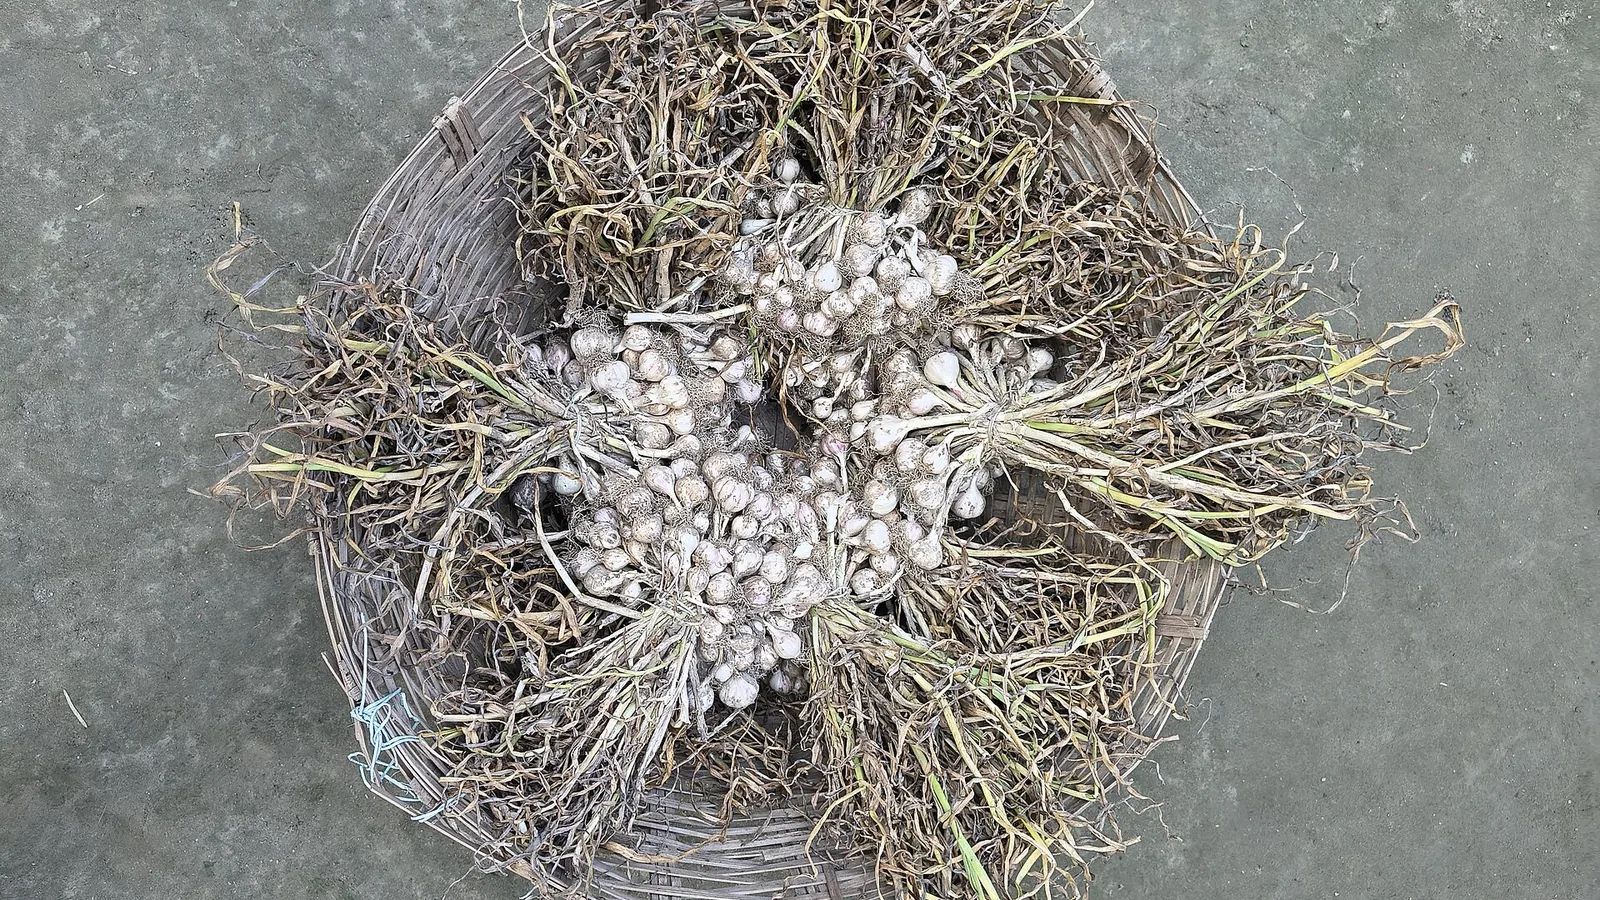
A basket of freshly harvested garlic bulbs with their roots
How to grow

Garlic

Takes a hard frost. Plant in fall up to 2 weeks after your first fall frost. First harvest 240 to 280 days from planting.

Photo: “Freshly harvested garlic (Allium sativum), Kurigram, Bangladesh” by Tanvir Rahat, CC BY-SA 4.0, via Wikimedia Commons (cropped). The cropped version is shared under the same licence.

  • Full sun6–8 hours or more
  • 3–6 in apartRows 6–30 in
  • 240–280 daysFrom planting out
  • pH 6.0–7.0Soil pH
  • 1 in a weekEven watering
  • HardyTakes a hard frost

Your dates

Put in your ZIP code to see when to start, plant and harvest garlic where you live, from your own frost dates.

Look up the frost dates for this ZIP code
Open my planting calendarOpen the planting calendar Add this crop to the calendar saved on this device

From seed to harvest

  1. PlantSet in the groundWeek 0
  2. SproutFirst shoots showWeek 2–22
  3. Leaf growthLeaves fill outWeek 24–28
  4. Bulb swellsBulbs fattenWeek 30–34
  5. Tops fallLeaves flop and yellowWeek 34–38
  6. HarvestReady to pickWeek 35–40

How to plant and grow

  1. Get good cloves

    Buy seed garlic from a garden source, not the grocery store. Split bulbs into cloves just before planting and keep the largest ones.

  2. Plant in fall

    Plant around the first killing frost, up to 2 weeks after. Roots form before the ground freezes and shoots come up in spring.

  3. Set the cloves

    Push cloves pointed end up, 2 to 3 inches deep and 3 to 6 inches apart. Rows can be close in beds or wider for easy weeding.

  4. Mulch for winter

    Cover the bed with 3 to 4 inches of straw or leaves to even out winter soil temperatures. Pull it back in spring or leave it for weed control.

  5. Water and trim scapes

    Give about 1 inch of water a week in spring. Snap off the curly flower stalks on hardneck types. Stop watering about 2 weeks before harvest.

  6. Harvest and cure

    Dig in early to midsummer when lower leaves brown but about half the upper leaves are green. Dry whole plants in warm shade for 2 to 4 weeks.

Common problems

Onion thripsPest

What you'll see: Silvery streaks and blotches on leaves, with tiny black specks. The tiny, slender insects hide deep in the neck.

Prevent

  • Control weeds and remove onion culls and debris.
  • Overhead watering or heavy rain knocks numbers down.

Organic options

  • Insecticidal soap or spinosad, aimed down into the neck. Look for OMRI Listed products.

Conventional options

  • Several insecticides are labeled; check the crop is listed. Thrips grow resistant when one product is used over and over.

Bee caution: Don't spray open flowers. Spray in the late evening, when bees aren't flying.

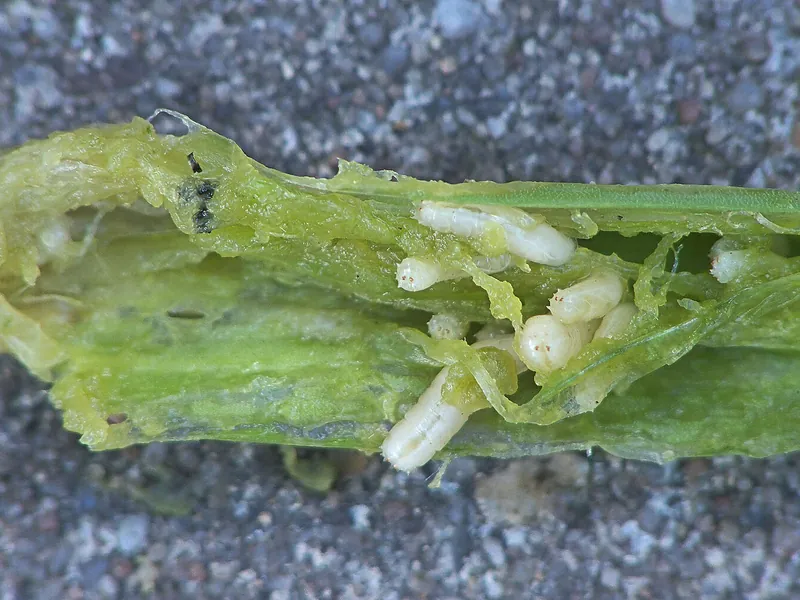
White onion maggots feeding inside a split leek stem
Photo: “Delia antiqua maggots at Allium porrum , uienvlieg maden op prei (1)” by Rasbak, CC BY-SA 3.0, via Wikimedia Commons (cropped). The cropped version is shared under the same licence.

Onion maggotPestNo spray helps

What you'll see: Young onions, garlic, leeks, shallots and chives wilt and yellow. Small white maggots tunnel in the bulb or stem, which may rot.

Prevent

  • Cover rows with row cover at planting, and bury the edges.
  • Plant far from last year's onions, and never cover ground that had maggots.
  • Remove culled onions and debris after harvest.

Organic options

  • Pull and destroy infested plants with the maggots in them.

Conventional options

  • None for home gardens. No insecticide is available to treat the soil before planting.
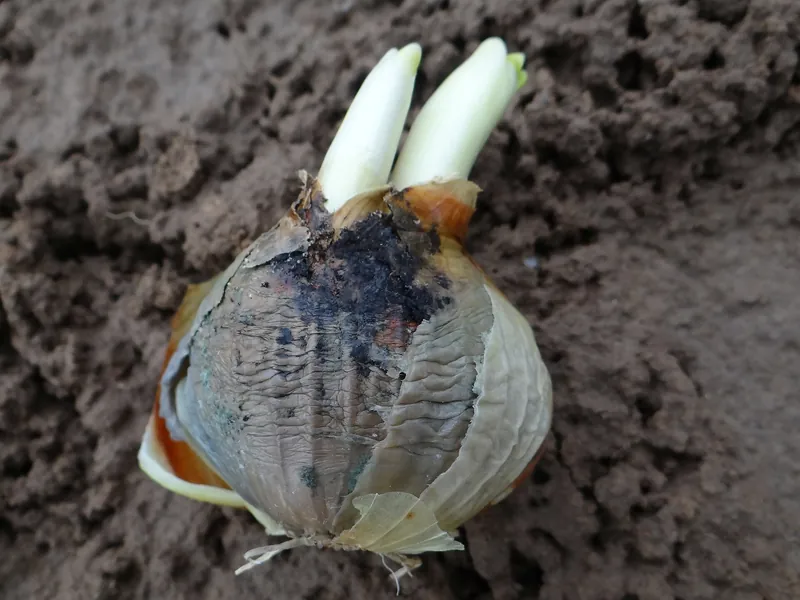
An onion bulb rotting with grey neck rot mould
Photo: “Botrytis allii a2 (1)” by Jerzy Opioła, CC BY-SA 4.0, via Wikimedia Commons (cropped). The cropped version is shared under the same licence.

Neck rotDiseaseNo spray helps

What you'll see: Stored bulbs soften and turn brown from the neck down, often with gray mold. Signs usually show a month or two after harvest.

Prevent

  • Let tops fall and necks dry fully before storing; cure bulbs somewhere warm and airy.
  • Go easy on nitrogen late in the season.
  • Store bulbs cool and dry, with air flow.

Organic options

  • Sort stored bulbs often and remove any soft ones.

Conventional options

  • None for home gardens. Curing is the control.

Read and follow the product label: it is the law. It sets the rate, the crops it is for, and the days between spraying and picking. Products registered vary by state; for organic growing, look for products allowed under the USDA National Organic Program (OMRI Listed). We name active ingredients, not brands or rates.

ShareShare a link to this growing guide.

Share this growing guide

The link opens this growing guide, so anyone can read it and look up their own planting dates.

FacebookShare this link on Facebook.XShare this link on X.LinkedInShare this link on LinkedIn.RedditShare this link on Reddit.PinterestShare this link on Pinterest.EmailEmail this link.Open your device's share menu. Copy the link to your clipboard.

Growing more than you can eat? Sell it at a farm stand. TallyTill takes cards and keeps count of what sells, and the Stand plan is free.
Get started with TallyTill for free

Sources

Planting dates and growing facts checked against these university extension and USDA pages:

Growth-stage drawings: TallyTill.

Reconnecting…
One moment — we're restoring your session.