Takes a hard frost. A perennial for zones 5 to 9. Plant out up to 2 weeks after your last frost; plant in fall 8 to 12 weeks before your first fall frost. First harvest 12 to 14 months from planting.
Put in your ZIP code to see when to start, plant and harvest lavender where you live, from your own frost dates.
Open my planting calendarOpen the planting calendarAdd this crop to the calendar saved on this device
From seed to harvest
SowSeed goes inWeek 0
SproutFirst shoots showWeek 0–1
True leavesFirst real leavesWeek 1–2
Thin or plant outGive each plant roomWeek 2–3
Leaf growthLeaves fill outWeek 4–8
HarvestReady to pickWeek 52–60
How to plant and grow
Start from plants
Seed is slow and plants vary, often taking 100 to 200 days to reach transplant size. Most growers set out nursery plants or rooted cuttings.
Pick a dry, sunny spot
Give it 6 to 8 hours of sun and lean, sandy or gravelly soil that drains fast. A pH of about 6.5 to 7.5 suits it; lime acid soil.
Plant after frost
Set plants out after the last spring frost, 18 to 36 inches apart by variety. Fall planting also works with about two months of mild weather left.
Water to establish
Water regularly until roots take hold, then sparingly. Wet soil, mostly in winter, brings root rot, the main cause of losses.
Shape, then harvest
In the first year, clip branches to shape the plant. From then on, cut flower stems as the buds start to open, in the morning after dew dries.
Shear after bloom
Cut plants back by about half each year after flowering to keep them compact. English types often bloom again later in the season.
Mulch lightly in winter
After the ground freezes, add a light mulch of straw or evergreen boughs. Heavy, wet mulch does more harm than good.
Common problems
Root rotDiseaseNo spray helps
What you'll see: Plants yellow, wilt and die back even though the soil is wet. Roots are brown, soft and few, and bean seedlings may rot at the soil line.
Prevent
Plant in well-drained soil; grow raspberries on beds raised about a foot.
Do not overwater.
Plant beans and peas in a new spot each year, and sow them only once the soil has warmed.
Start with healthy plants, and do not move soil from a sick bed to a healthy one.
Organic options
Remove and dispose of dying plants and clear crop debris after harvest.
Conventional options
None. Fungicides have not proven effective in home gardens; drainage is the fix.
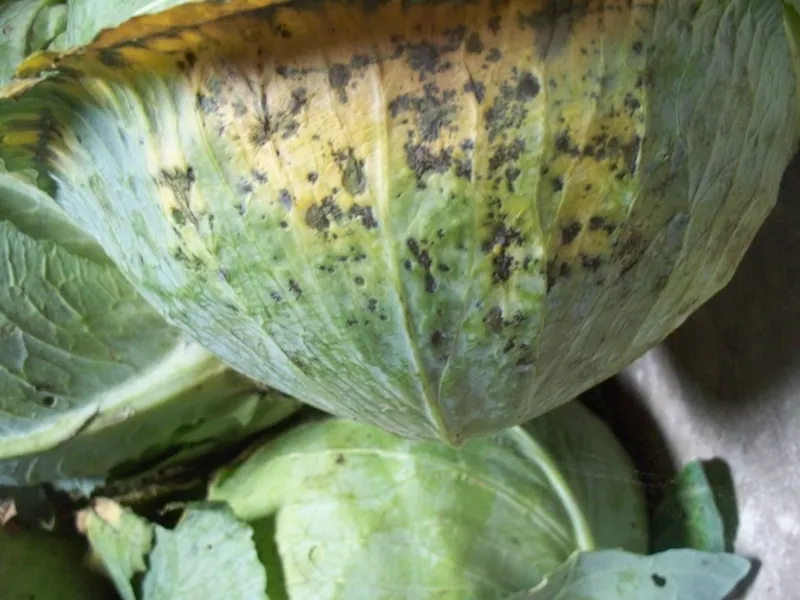
What you'll see: Round brown, tan or purple spots on leaves, sometimes with rings or a dark edge. The centers may drop out, leaving holes.
Prevent
Rotate crops, and clear spotted leaves and debris in fall.
Water at the base and space plants for air flow.
Buy clean seed and healthy plants.
Organic options
Pick off spotted leaves; a few spots do little harm.
Copper fungicide can protect new leaves. Look for OMRI Listed products.
Conventional options
Chlorothalonil on cabbage-family crops, if labeled. Sprays are seldom needed in a home garden.
Bee caution: Don't spray open flowers. Spray in the late evening, when bees aren't flying.
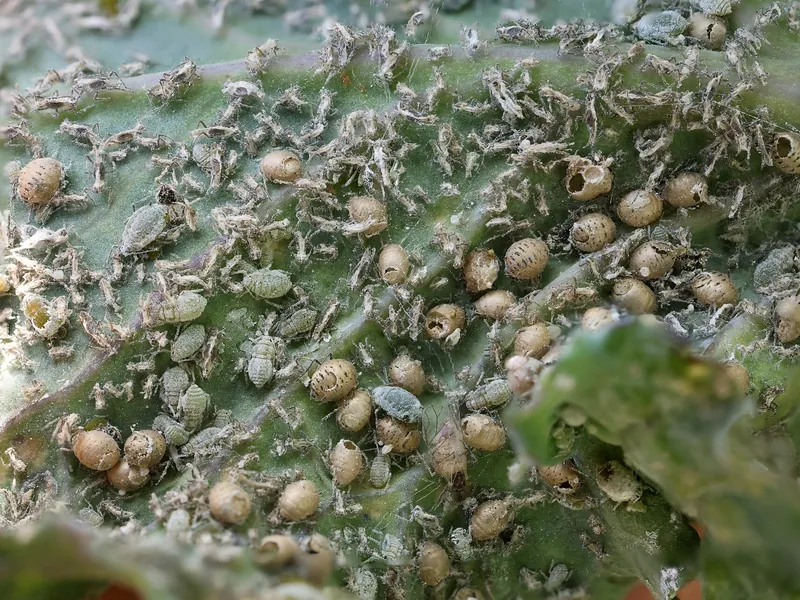
Photo: “Aphids on Kale leaf” by Sanjay Acharya, CC BY-SA 4.0, via Wikimedia Commons (cropped). The cropped version is shared under the same licence.
AphidsPest
What you'll see: Clusters of small, soft-bodied green, black or gray insects on new shoots and under leaves. Leaves curl, and a sticky film may coat them.
Prevent
Check leaf undersides each week; a few aphids do little harm.
Pull nearby weeds, such as wild mustards, that feed aphids.
Grow flowers for lady beetles, lacewings and hover flies, and avoid broad sprays that kill them.
Organic options
Knock aphids off with a strong spray of water.
Insecticidal soap or horticultural oil on leaf undersides, repeated as the label allows.
Neem oil, or OMRI Listed pyrethrins (without piperonyl butoxide).
Conventional options
Malathion or permethrin, if the crop is on the label. These also kill the insects that eat aphids.
Bee caution: Don't spray open flowers. Spray in the late evening, when bees aren't flying.
Read and follow the product label: it is the law. It sets the rate, the crops it is for, and the days between spraying and picking. Products registered vary by state; for organic growing, look for products allowed under the USDA National Organic Program (OMRI Listed). We name active ingredients, not brands or rates.
The link opens this growing guide, so anyone can read it and look up their own planting dates.
FacebookShare this link on Facebook.XShare this link on X.LinkedInShare this link on LinkedIn.RedditShare this link on Reddit.PinterestShare this link on Pinterest.EmailEmail this link.Open your device's share menu.Copy the link to your clipboard.
Growing more than you can eat? Sell it at a farm stand. TallyTill takes cards and keeps count of what sells, and the Stand plan is free.
 Sow
 Sprout
 True leaves
 Thin or plant out
 Leaf growth
 Harvest