Takes a hard frost. A perennial for zones 4 to 8. Start indoors 6 to 8 weeks before your last frost; plant out up to 2 weeks after your last frost; sow outdoors up to 2 weeks after your last frost. First harvest 75 days from planting.
Full sun to part shadeSome afternoon shade is fine
18–24 in apart
75 daysFrom planting out
pH 6.0–8.0Soil pH
HardyTakes a hard frost
Zones 4–8Comes back each year
Your dates
Put in your ZIP code to see when to start, plant and harvest sage where you live, from your own frost dates.
Open my planting calendarOpen the planting calendarAdd this crop to the calendar saved on this device
From seed to harvest
SowSeed goes inWeek 0
SproutFirst shoots showWeek 1–3
True leavesFirst real leavesWeek 3–5
Thin or plant outGive each plant roomWeek 6–10
Leaf growthLeaves fill outWeek 8–12
HarvestReady to pickWeek 16–20
How to plant and grow
Start seed indoors
Sow seed 6 to 8 weeks before your average last frost, or sow outdoors around that date. Cuttings and layered stems give a quicker start.
Plant in full sun
Set plants out after frost danger passes, 18 to 24 inches apart, in full sun and very well-drained soil. Light afternoon shade is fine.
Water with care
Sage takes drought but grows better with steady moisture. Never let the soil stay soggy, since wet roots rot.
Start picking
Begin picking leaves about 75 days after planting. Never take more than half the plant at one time.
Cut before bloom
For the best flavor, cut 6 to 8 inches off the tops before the plants flower, at least twice a season.
Replace woody plants
Plants get woody and less productive after three to five years. Root cuttings or layer a stem to raise replacements.
Common problems
Root rotDiseaseNo spray helps
What you'll see: Plants yellow, wilt and die back even though the soil is wet. Roots are brown, soft and few, and bean seedlings may rot at the soil line.
Prevent
Plant in well-drained soil; grow raspberries on beds raised about a foot.
Do not overwater.
Plant beans and peas in a new spot each year, and sow them only once the soil has warmed.
Start with healthy plants, and do not move soil from a sick bed to a healthy one.
Organic options
Remove and dispose of dying plants and clear crop debris after harvest.
Conventional options
None. Fungicides have not proven effective in home gardens; drainage is the fix.
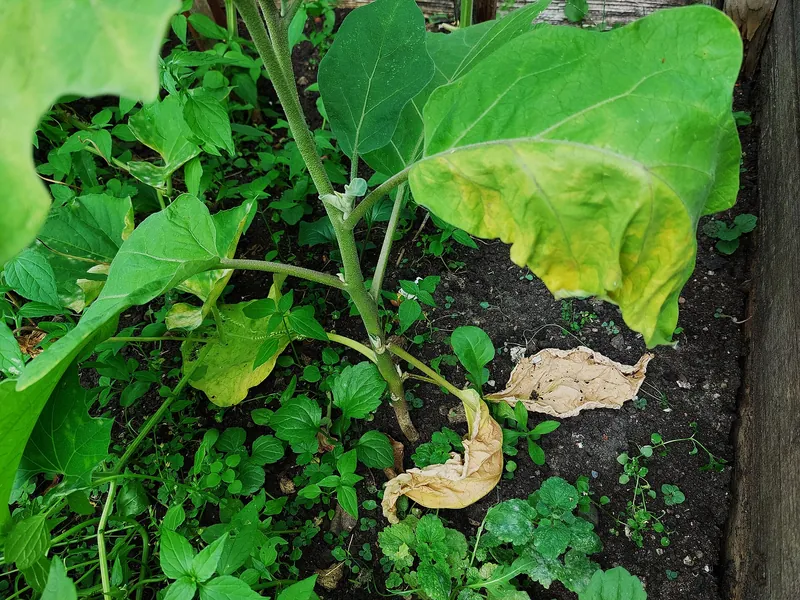
What you'll see: Lower leaves yellow at the edges, wilt and die, often on one side, and the plant slowly declines. A cut stem shows brown streaks.
Prevent
Grow resistant varieties; look for V on the label.
Rotate away from tomatoes, potatoes, peppers and eggplant for several years.
Keep weeds down; many weeds carry it.
Bin infected plants; do not compost them.
Organic options
Pull infected plants. Early-maturing varieties may still give a crop.
Conventional options
None. Infected plants cannot be cured.
Read and follow the product label: it is the law. It sets the rate, the crops it is for, and the days between spraying and picking. Products registered vary by state; for organic growing, look for products allowed under the USDA National Organic Program (OMRI Listed). We name active ingredients, not brands or rates.
The link opens this growing guide, so anyone can read it and look up their own planting dates.
FacebookShare this link on Facebook.XShare this link on X.LinkedInShare this link on LinkedIn.RedditShare this link on Reddit.PinterestShare this link on Pinterest.EmailEmail this link.Open your device's share menu.Copy the link to your clipboard.
Growing more than you can eat? Sell it at a farm stand. TallyTill takes cards and keeps count of what sells, and the Stand plan is free.
 Sow
 Sprout
 True leaves
 Thin or plant out
 Leaf growth
 Harvest