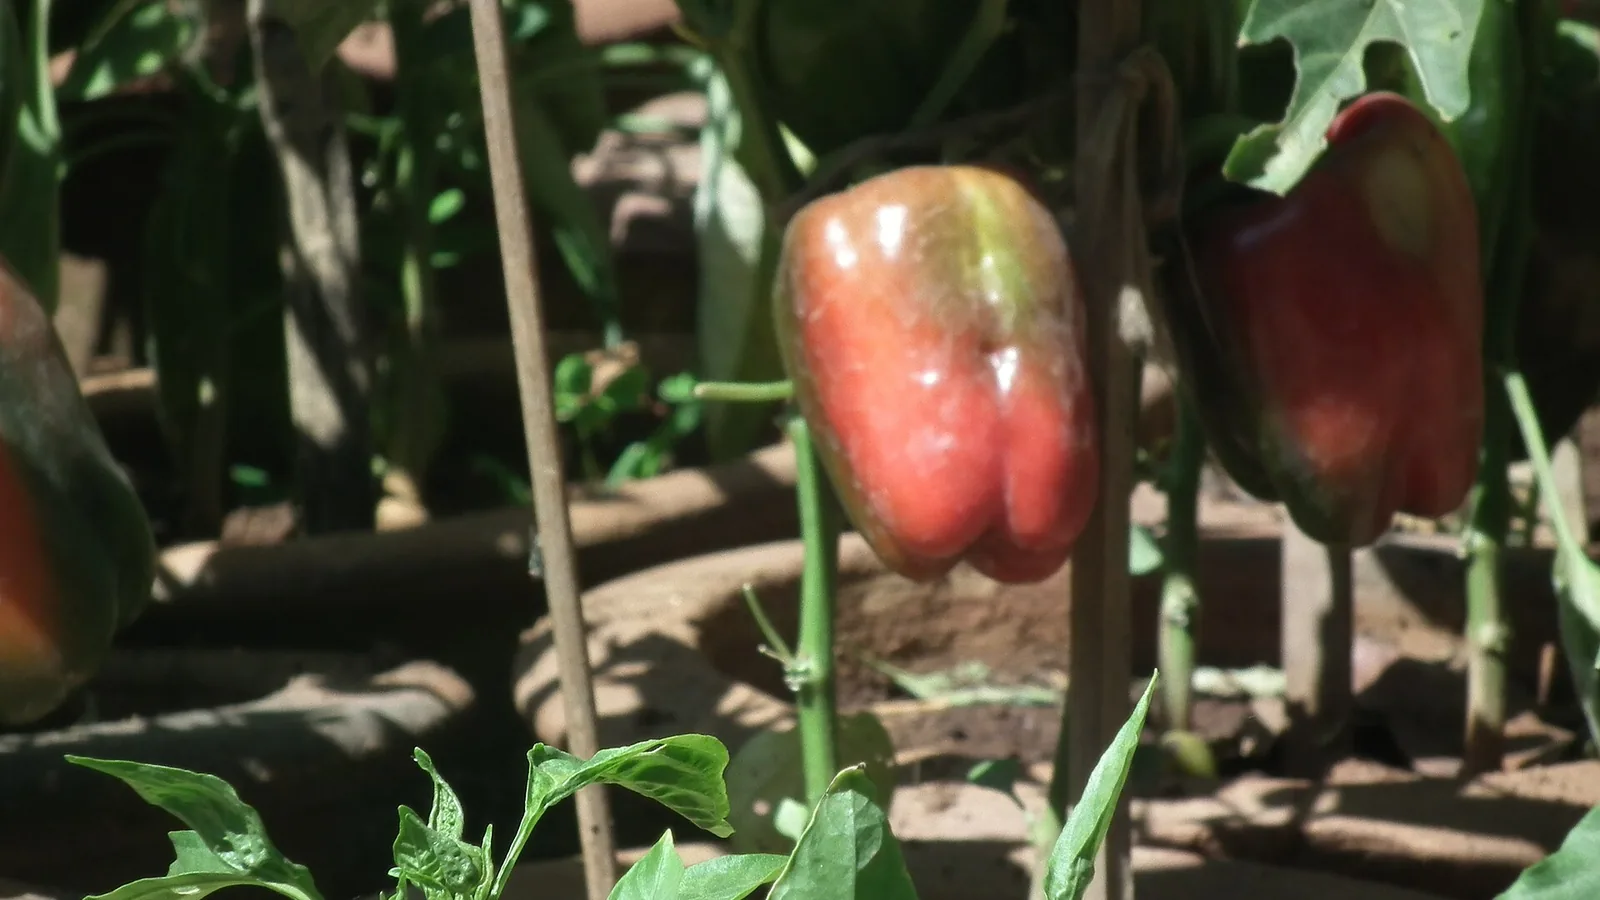
Warm-season and frost-tender. Start indoors 6 to 8 weeks before your last frost; plant out 2 to 3 weeks after your last frost. First harvest 60 to 85 days from planting.
Put in your ZIP code to see when to start, plant and harvest sweet peppers where you live, from your own frost dates.
Open my planting calendarOpen the planting calendarAdd this crop to the calendar saved on this device
From seed to harvest
SowSeed goes inWeek 0
SproutFirst shoots showWeek 1–2
Plant outSet out transplantsWeek 6–8
FlowersFlowers openWeek 10–12
Fruit setsSmall fruit formsWeek 11–14
HarvestReady to pickWeek 15–20
How to plant and grow
Start seeds early
Sow seeds 1/4 inch deep 6 to 8 weeks before your last frost. Peppers sprout best in very warm soil, 80 to 90 °F, so a heat mat helps.
Wait for warm nights
Plant out only after frost danger is gone and nights stay above 50 °F. Cold nights stunt peppers and can cause flowers to drop.
Space the plants
Set plants 12 to 18 inches apart in rows about 30 to 36 inches apart. Dark plastic mulch warms the soil and speeds early growth.
Water weekly
Give at least an inch of water a week and keep moisture steady, especially as fruit sets. Uneven watering leads to blossom end rot.
Rotate the bed
Do not plant where tomatoes, potatoes, eggplant or peppers grew in the last 3 years to reduce soil diseases.
Harvest green or ripe
Pick fruits once full size and firm. Many varieties taste good green; leave some on the plant longer if you want red, yellow or orange fruit.
Common problems
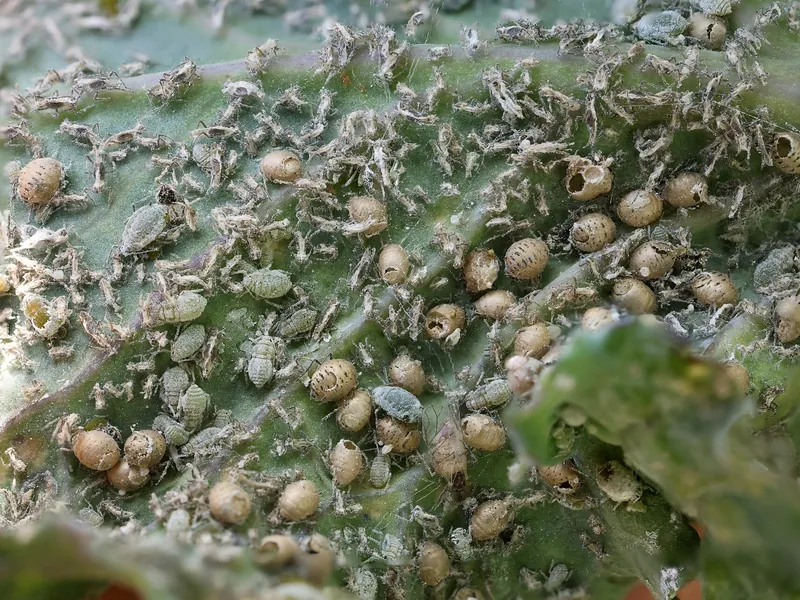
Photo: “Aphids on Kale leaf” by Sanjay Acharya, CC BY-SA 4.0, via Wikimedia Commons (cropped). The cropped version is shared under the same licence.
AphidsPest
What you'll see: Clusters of small, soft-bodied green, black or gray insects on new shoots and under leaves. Leaves curl, and a sticky film may coat them.
Prevent
Check leaf undersides each week; a few aphids do little harm.
Pull nearby weeds, such as wild mustards, that feed aphids.
Grow flowers for lady beetles, lacewings and hover flies, and avoid broad sprays that kill them.
Organic options
Knock aphids off with a strong spray of water.
Insecticidal soap or horticultural oil on leaf undersides, repeated as the label allows.
Neem oil, or OMRI Listed pyrethrins (without piperonyl butoxide).
Conventional options
Malathion or permethrin, if the crop is on the label. These also kill the insects that eat aphids.
Bee caution: Don't spray open flowers. Spray in the late evening, when bees aren't flying.
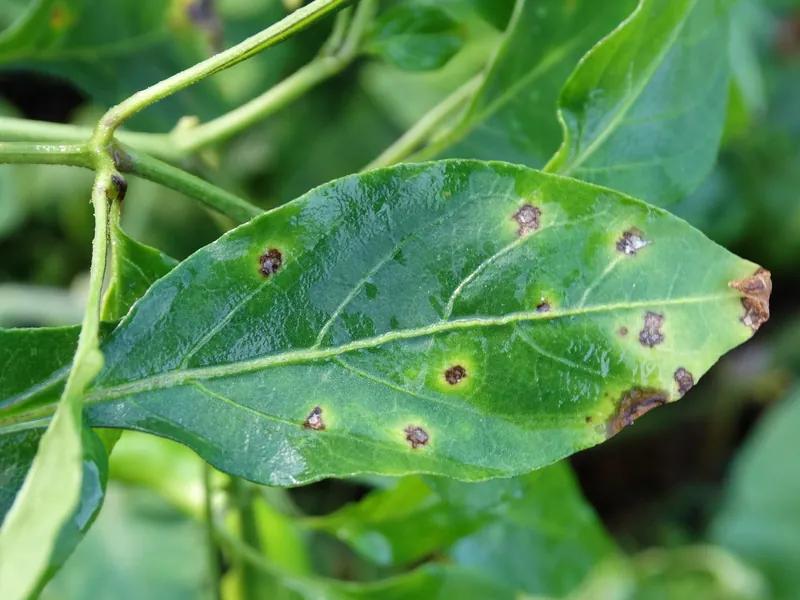
What you'll see: Small water-soaked spots on leaves turn brown, sometimes with a yellow edge, and leaves drop. Pepper fruit gets raised, scabby spots.
Prevent
Buy clean seed and healthy transplants.
Do not plant peppers or tomatoes where either grew last year.
Water at the base, and stay out of the garden while plants are wet.
Organic options
Pull off spotted leaves and remove badly infected plants.
Copper slows the spread when started early. Look for OMRI Listed products.
Conventional options
Same as organic: copper is the main spray. Control is hard once the disease is established.
Bee caution: Don't spray open flowers. Spray in the late evening, when bees aren't flying.
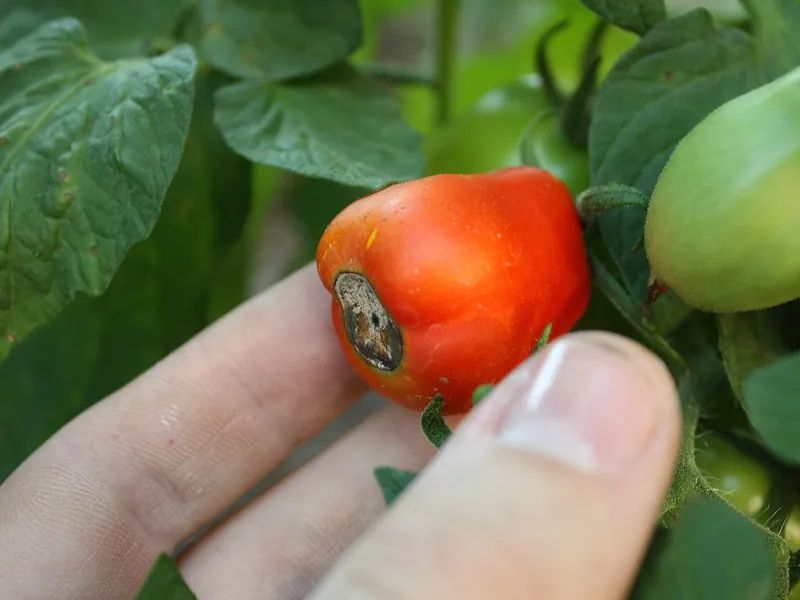
Photo: “Blossom end rot” by A13ean, CC BY-SA 3.0, via Wikimedia Commons (cropped). The cropped version is shared under the same licence.
Blossom-end rotGrowing problemNo spray helps
What you'll see: A sunken, leathery dark patch forms on the bottom end of the fruit. It is not a disease: the fruit ran short of calcium, almost always because watering was uneven.
Prevent
Water deeply and evenly; drip irrigation on a timer helps.
Mulch to keep soil moisture steady.
Test the soil before planting and lime only if the test calls for it.
Go easy on ammonium nitrogen fertilizer.
Organic options
Even watering and mulch fix it. Pick off affected fruit.
Conventional options
Same as organic. Calcium sprays do not work: leaves cannot move calcium into the fruit.
SunscaldGrowing problemNo spray helps
What you'll see: Pale, papery or sunken white patches on the sun-facing side of the fruit, often after the plant has lost leaves. Rot may follow.
Prevent
Keep plants leafy: water, feed and control leaf diseases.
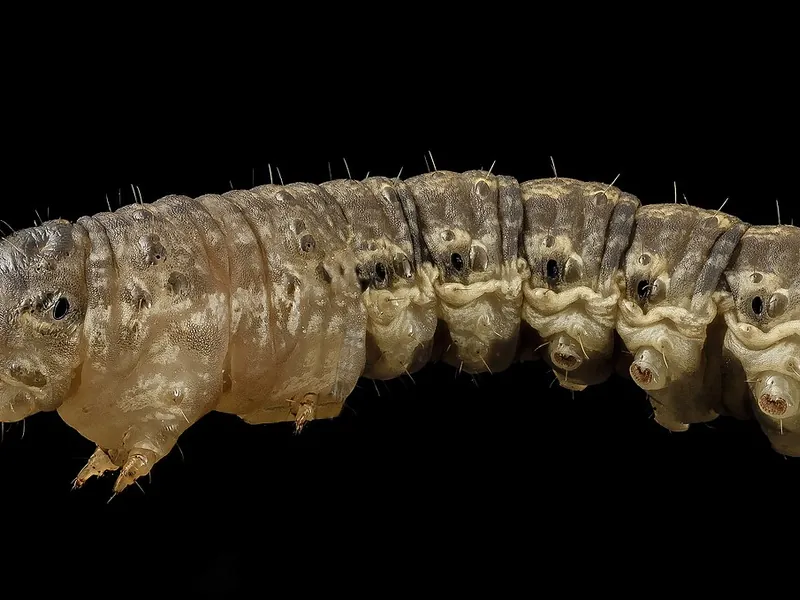
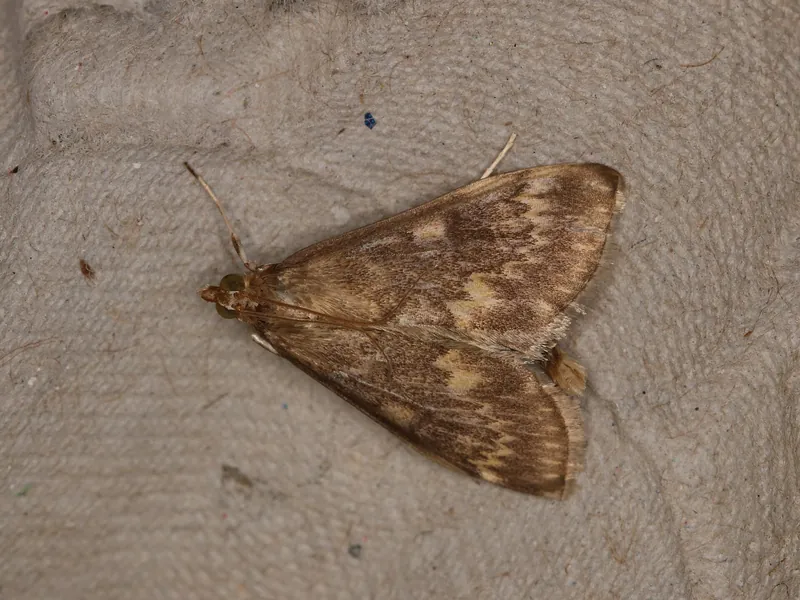
What you'll see: Small holes in corn stalks and ears with sawdust-like droppings, and broken tassels. In peppers, larvae bore in under the cap and the fruit rots.
Prevent
Remove or till under corn stalks after harvest; larvae spend the winter in them.
Keep the garden and its edges weeded.
Check corn whorls for small holes and brown droppings when tassels appear.
Organic options
Bt (Bacillus thuringiensis kurstaki) or spinosad into the whorls when damage shows. Look for OMRI Listed products.
Cut away damaged parts of ears; the rest is fine to eat.
Conventional options
Carbaryl into the whorls, if sweet corn is on the label. A home garden seldom needs it.
Bee caution: Don't spray open flowers. Spray in the late evening, when bees aren't flying.
Read and follow the product label: it is the law. It sets the rate, the crops it is for, and the days between spraying and picking. Products registered vary by state; for organic growing, look for products allowed under the USDA National Organic Program (OMRI Listed). We name active ingredients, not brands or rates.
The link opens this growing guide, so anyone can read it and look up their own planting dates.
FacebookShare this link on Facebook.XShare this link on X.LinkedInShare this link on LinkedIn.RedditShare this link on Reddit.PinterestShare this link on Pinterest.EmailEmail this link.Open your device's share menu.Copy the link to your clipboard.
Growing more than you can eat? Sell it at a farm stand. TallyTill takes cards and keeps count of what sells, and the Stand plan is free.
 Sow
 Sprout
 Plant out
 Flowers
 Fruit sets
 Harvest